Details:Key Features and Advantages
1. The rolling eccentric cone setup
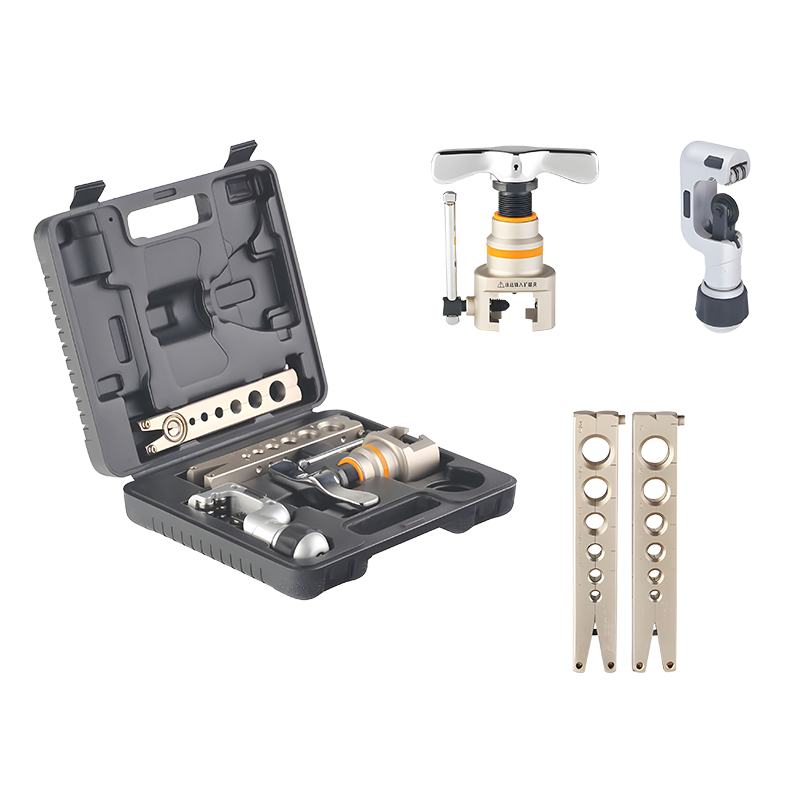
The big deal here is the eccentric cone mechanism. Instead of just ramming straight down and mashing the metal, the cone rolls its way around the inside rim of the pipe. By working the copper from multiple angles, it flares or swages the tube completely evenly without thinning out one side or buckling the shoulder. This is a massive help when you're dealing with fussy, thin-walled lines where one bad stretch means a leak.
2. Heavy-duty trip ring riveting
We put this tool through a specific trip ring riveting process to make sure the yoke doesn't get sloppy after a few busy months. It reinforces the whole pivoting head assembly so it stays rock-solid when you are cranked down under heavy pressure. It cuts out the annoying wobble you get with cheap flaring bars, meaning the tool holds its alignment season after season without binding up or breaking.
3. Smooth arc transition on the flare nozzle
The cone nozzle features a smooth, radius arc transition rather than a sharp, hard edge. This little structural detail means the copper tube stretches naturally without creating a sharp stress line at the bottom of the flare. It stops the pipe wall from fracturing or cracking under line vibrations later on, lowering the risk of call-backs for leaking joints.
4. Chunky handle that saves your thumbs
Cranking down on hard copper shouldn't destroy your hands. The handle is shaped to give your fingers a solid purchase, giving you way better leverage so you aren't fighting the tool. It makes running repetitive connections on a long install day a lot less of a headache.
How to Use
This setup is built specifically for stretching copper lines and dropping bell-mouth flares—the standard joint you need when hooking up split-system air conditioners or plumbing loops. Here is how you actually run it on the job:
1. Prep your copper line
Get your pipe cut square and make sure you clean out the inside burrs with a reamer. This is mostly what you'll be doing when preparing the line sets that link up the indoor evaporator and the outdoor condenser on a standard mini-split.
2. Slide the flare nut on
Don't skip this step or you'll be cutting your flare right back off—drop the coupling nut onto your soft, annealed copper tube before you lock it into the tool.
3. Set the pipe height in the block
Drop the copper line into the matching hole size on the gripping bar. You want to adjust the height so that roughly 1/5th of the tube's overall diameter is poking out above the face of the clamp.
4. Lock down the bar clamps
Once the pipe is sitting where it belongs, crank down the wing nuts on both ends of the gripping pliers. Get them tight so the tube doesn't slide down or tilt sideways when the cone starts pushing into it.
5. Line up the taper head
Slide the flaring yoke over the bar and center the taper head directly over the open nozzle of your copper pipe. The rolling cone is shaped to gradually stretch the lip out into that classic bell-mouth angle.
6. Spin the handle to form the joint
Slowly feed the screw clockwise. Take your time and keep your pressure steady as the cone works its way into the copper to form the flare. Don't force it blindly—once the clutch clicks or the resistance gets heavy, back it out so you don't over-stretch the metal or split the edge.


 English
 русский
 Español